Casio MG-510 Midi Guitar
Back when I documented the repair of the Casio PG-380 Midi Guitar, I had no idea that this post was going to dominate the traffic patterns to my little home on the web. Fully 1/3 of all visitors to this site come to that post, asking questions, posting comments, and requesting repairs. One request I've gotten over and over is a repair on the Casio MG-510.
The Casio MG-510 is like the little brother of the Casio PG-380. The base functionality is similar, but the 510 lacks some of the extra features that the PG-380 offers. The 510 has no space for an expansion slot, and no internal synthesizer, which for most software synth users is just fine. The biggest differences you'll notice between the 380 and the 510 are hammer on sensing and the ability to perform pitch bends. The 510 is strictly chromatic; when you bend it assumes the same pitch until you bend far enough to change notes, in which case a note off and note on message are sent and interpreted. The 380 will perform a pitch bend at even the slightest pull of the string.
The 510 and 380 share one major flaw though: the electrolytic capacitors used for the pitch envelopes. These heinous little surface mount caps tend to leak over the years, especially on the 510, leading to corrosion and in most cases total failure of the MIDI capabilities in the guitar.
I finally got around to repairing one of these guitars, and the process is so similar to the PG-380 that it would be a shame not to document it. If you're new to this you should probably refer to the post on the PG-380 before getting started.
Things You Will Need
- 6 x 1 uF non-polarized electrolytic capacitors
- 4 x 10 uF polarized electrolytic capacitors
- 1 x 22 uF polarized electrolytic capacitor
- 1 x 4.7 uF polarized electrolytic capacitor
- 1 x 33 uF polarized electrolytic capacitors
- Anything you need to unsolder old capacitors and solder on new ones
Crack Open the Back and Take a Look at the Boards
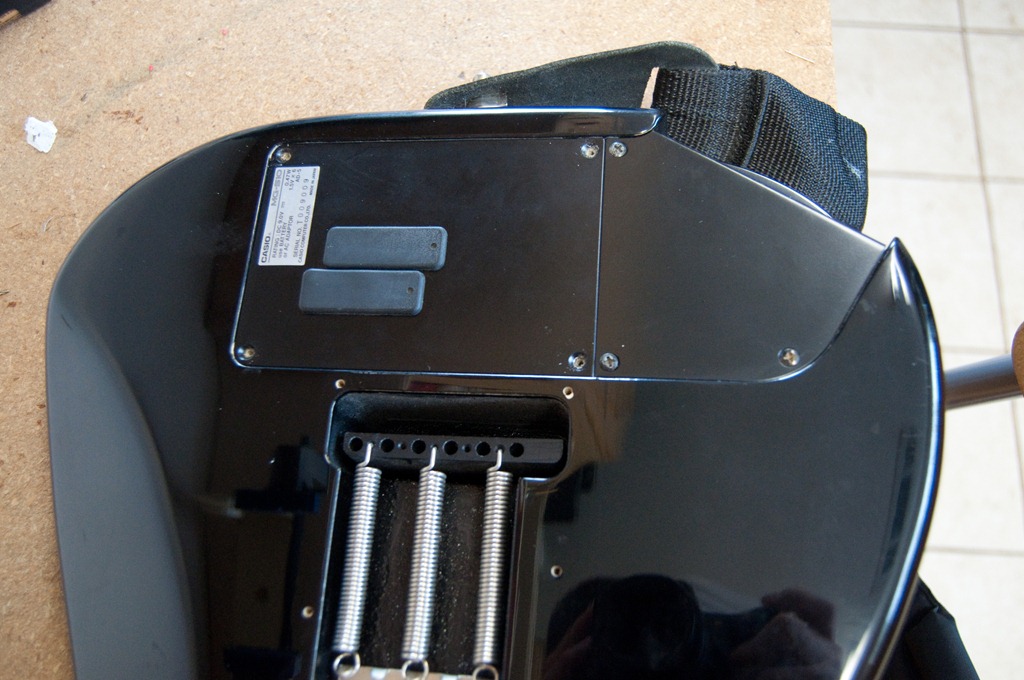
You'll see two double-stacked and plugged into three header cables.
Take Both Boards Out (unlike the PG-380 You Have to Operate on both)
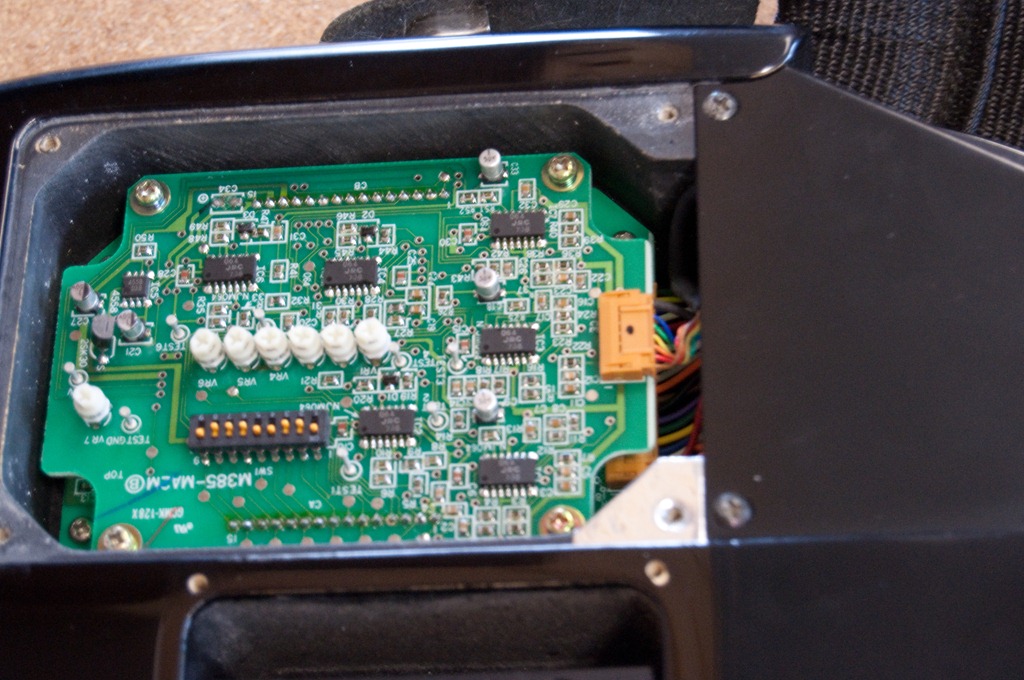
Take a Look at the Capacitors on Both Boards
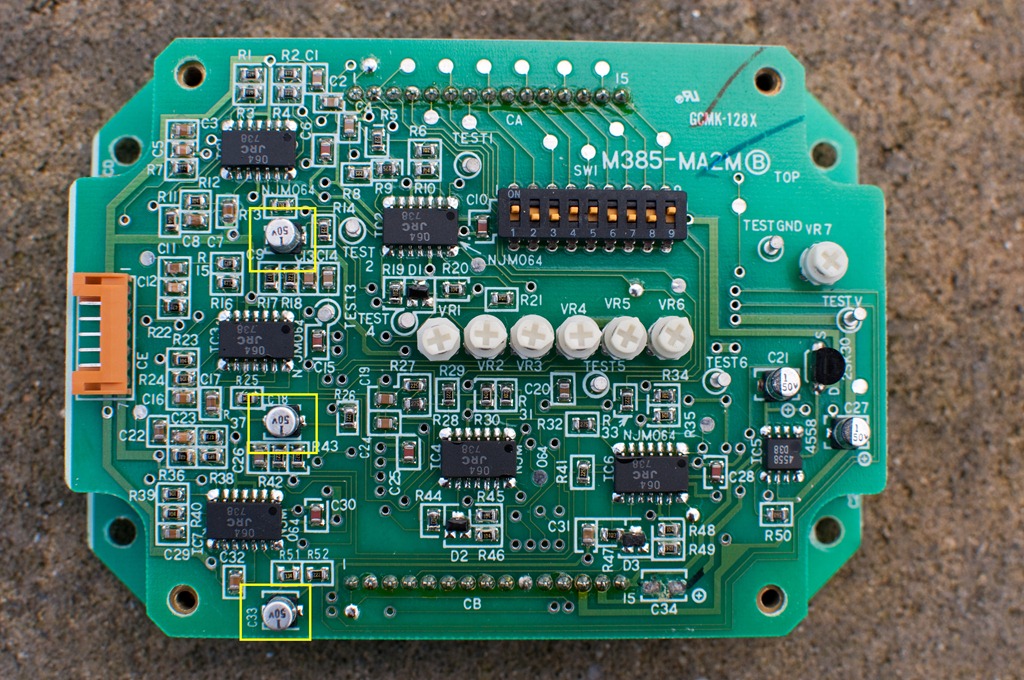
Top of PCB 1 – C9, C18, C33: 1uF non-polarized electrolytic
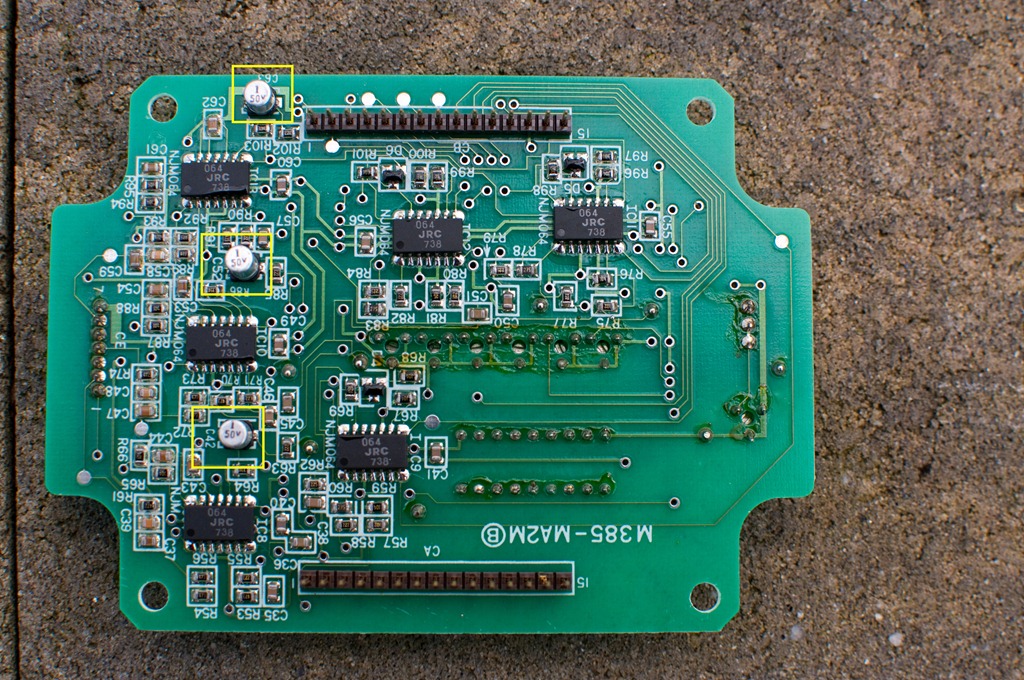
Bottom of PCB 1 C42, C52, C63: 1uF non-polarized electrolytic
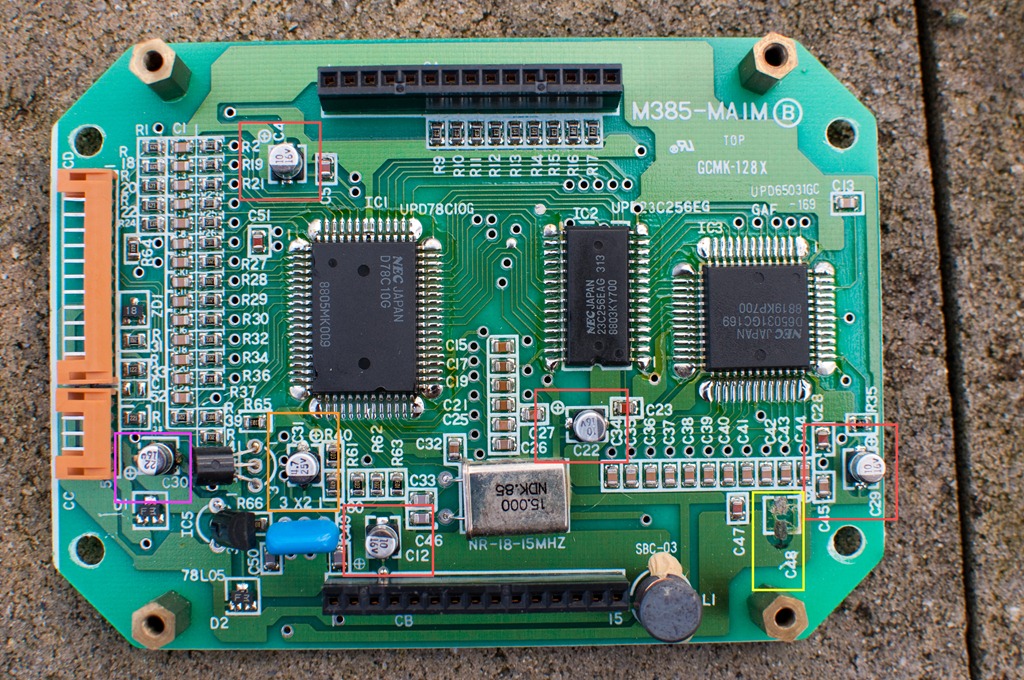
Top of PCB 2
- C4, C22, C29, C12: 10 uF polarized electrolytic
- C30: 22 uF polarized electrolytic
- C31: 4.7 uF polarized electrolytic
- C48: 33 uF polarized electrolytic
Basically, for both boards, replace the capacitors with the caps above using capacitors of identical value. It shouldn't matter if you use polarized caps for the entire repair, since the frequencies are not high enough to affect response times, but use non-polarized where needed above if possible.
You will find that you have 2 "extra" caps (seems like 2 for each string plus 2). I know that one capacitor is used for CPU reset (C30), but I'm not entirely sure what the last one is for. I replaced it anyway.
Some notes:
-
The traces on the top board are very small. You might find yourself pulling them while unsoldering the old caps. Not to worry, there are plenty of places to solder the new caps.
-
Corrosion makes for crappy contacts. If you find that your caps have corroded, particularly on the lower board, you will need to sand the corrosion down with steel wool or other light abrasive until you can expose some copper to solder to. On the guitar I repaired the corrosion was severe, and I spent a lot of time scraping out leaky capacitor guts.
That's really all there is to it. Plug the boards back into their headers, screw them back into the guitar, and adjust the trim pots as needed to calibrate the guitar again.